Every guy who shaves their head, even with one of the top head shavers, considers upgrading to a razor at some point. However, it’s a big step and there are lots of ways it can go wrong.
I’ve been shaving my head for nearly 20 years, and using a razor for around half that time. My advice is always to go for it – everyone should try it once! But first, you should know how to do it properly and safely so you can get the best shave you’ve ever had without damaging your scalp.
Here’s what you’ll need:
- A razor (obviously)
- Shaving cream or gel
- Exfoliating scrub
- Bald head shampoo or head wash
- Bald head moisturizer
Optional:
- Pre-shave oil
- Styptic pencil (for shaving cuts)
- An aftershave scalp treatment
Choosing the Right Razor
The best head-shaving razor for you will depend on what’s important to you, and on the type of scalp you have.
For example, if a close shave is the most important thing to you but you have a sensitive scalp, you may have to compromise a little as the smoothest finish often comes from razors that aren’t designed with sensitive skin in mind.
For me, closeness is the most important factor and luckily I don’t have a sensitive scalp. I’ve also been shaving my head for a long time so I’ve invested in a more premium razor.
More specifically, I use the Leaf Razor, purely because it gives me the smoothest shave I’ve found in nearly 20 years of trying. It’s not the cheapest, but if you use the code HAPPY10 at checkout you’ll get 10% off all products on the site:
The Leaf Razor
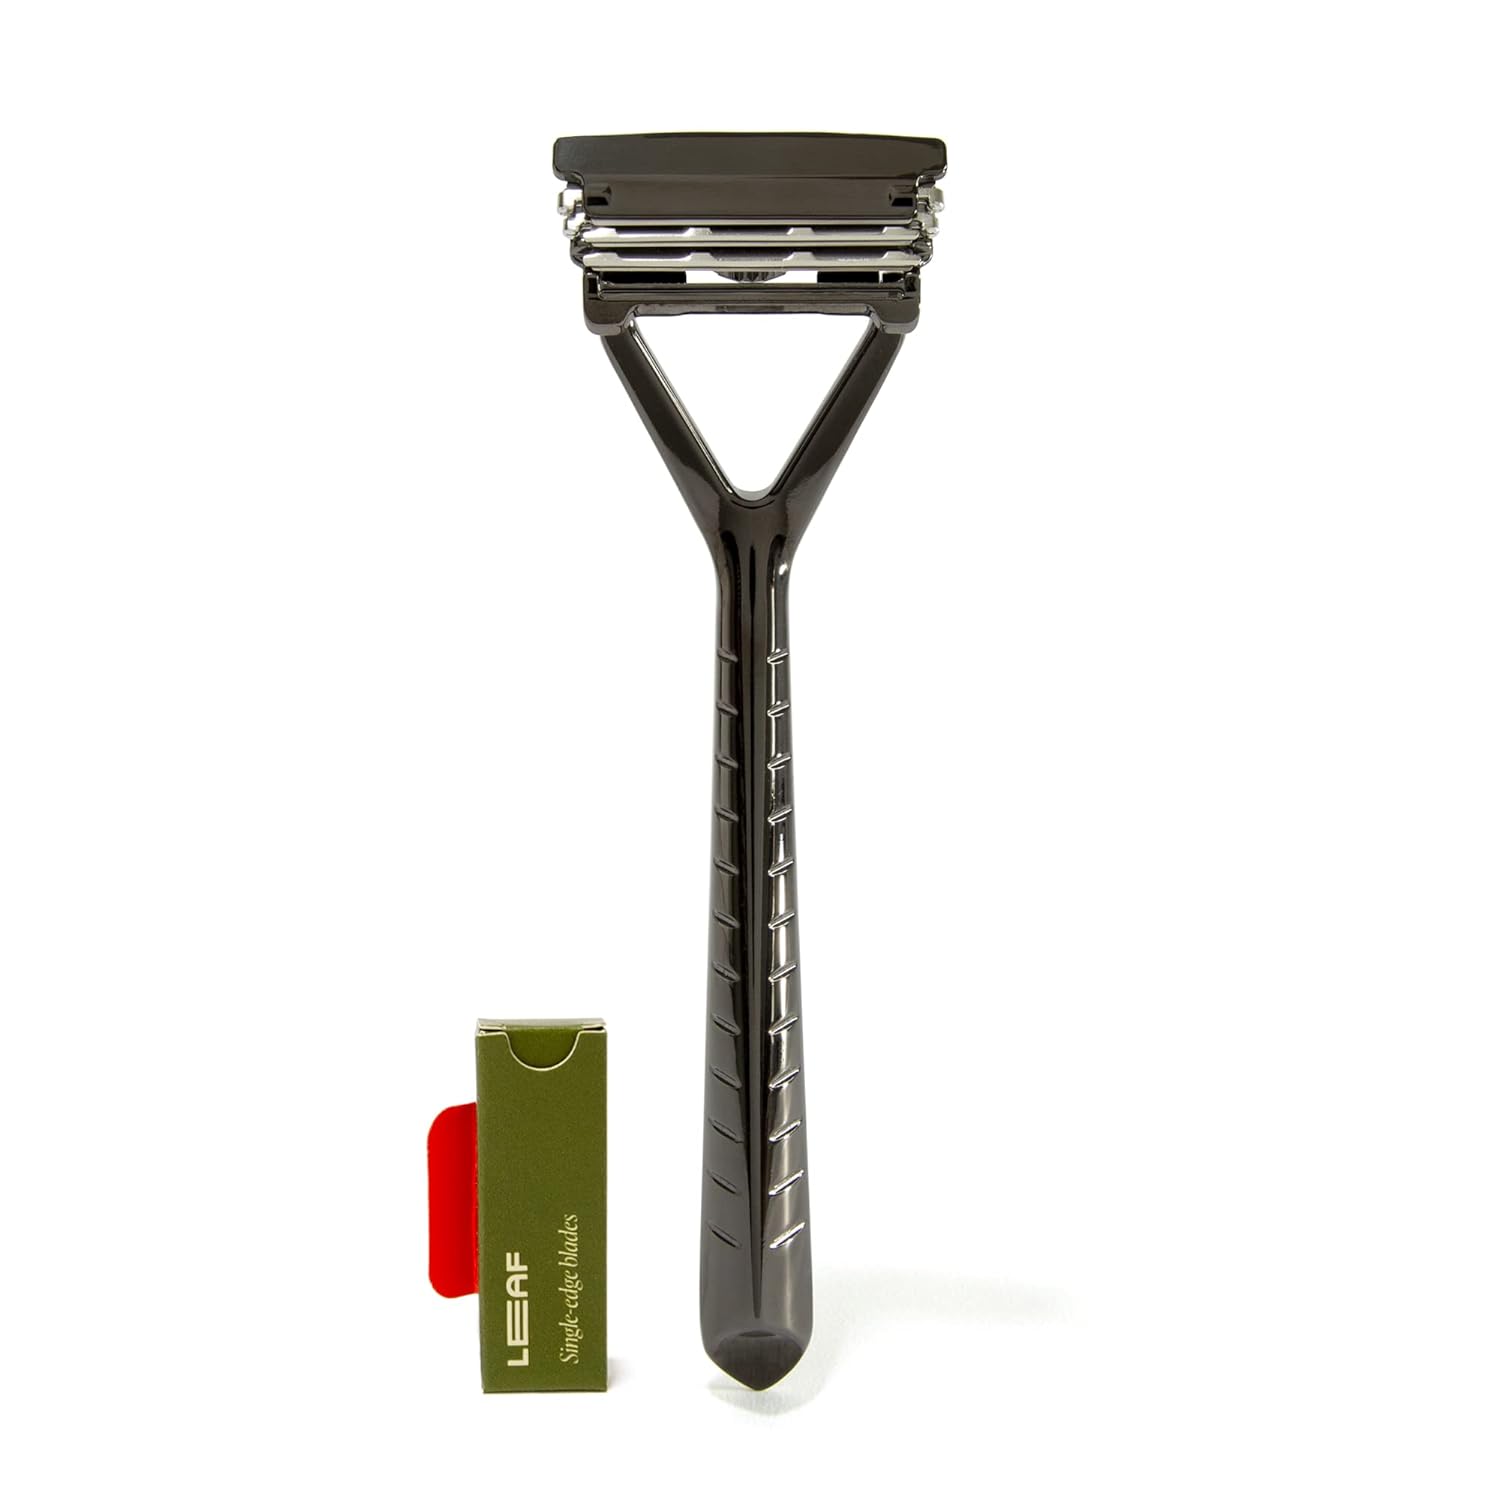
- Minimizes irritation
- Completely smooth shave
- 100% plastic free
- 10% off sitewide with code HAPPY10
The Leaf is the ideal choice if you’ve been shaving your head for a while and you want to upgrade to the best shave possible as a step up from your standard Gillette razor, for example. It’s also plastic-free, so you’re helping the planet at the same time.
If you’re new to head shaving, you’re probably not looking to spend that kind of money. You’ll also want something that’s easy to handle while you get used to the unfamiliar movement of shaving your head.
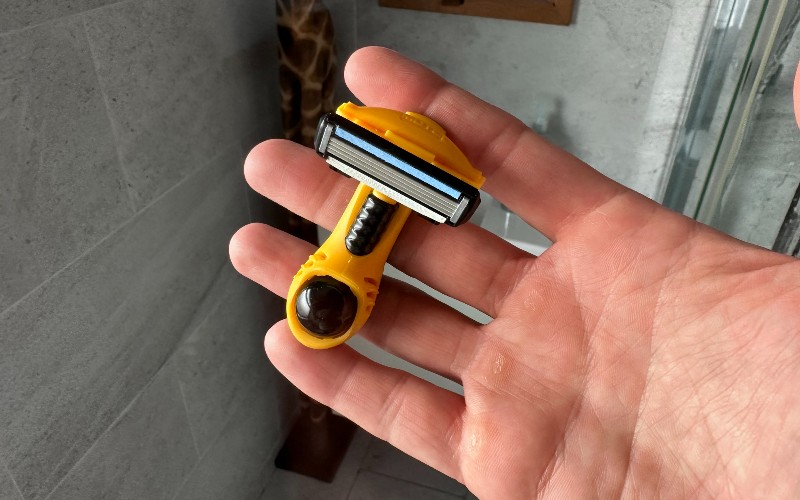
That’s where the HeadBlade Moto becomes an easy choice. It’s yours for around $15 and it’s easily the best design for beginners.
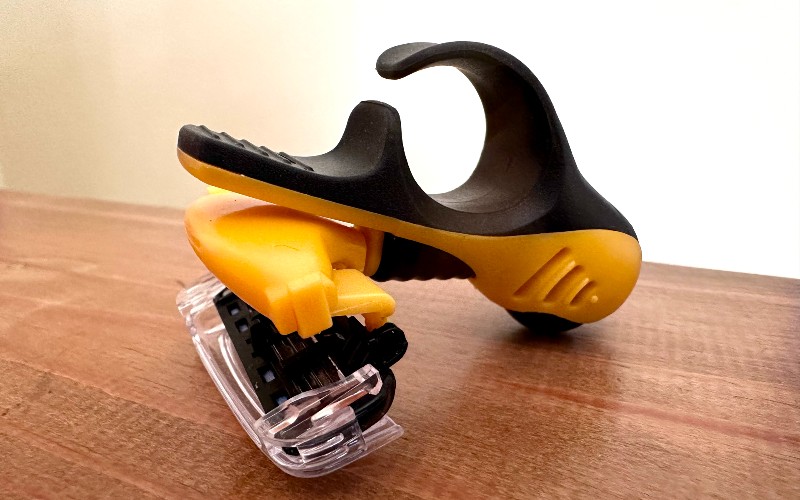
The Moto attaches to your finger and sits in the palm of your hand. This means that shaving is as easy and familiar as rubbing your hand over your scalp.
The rollerball acts as a guide for the blade as it moves over your head, with a flexible pivoting head helping to minimize cuts and nicks.
HeadBlade Moto Head Shaving Razor
- Lightweight & easy to use
- Dual-axis suspension for closeness
- Bargain price point
However, the Moto also isn’t the kindest on sensitive scalps so if you’re prone to redness and irritation from shaving, you’re better looking for a razor that’s specifically designed to reduce irritation:
Schick Hydro Sensitive Razor
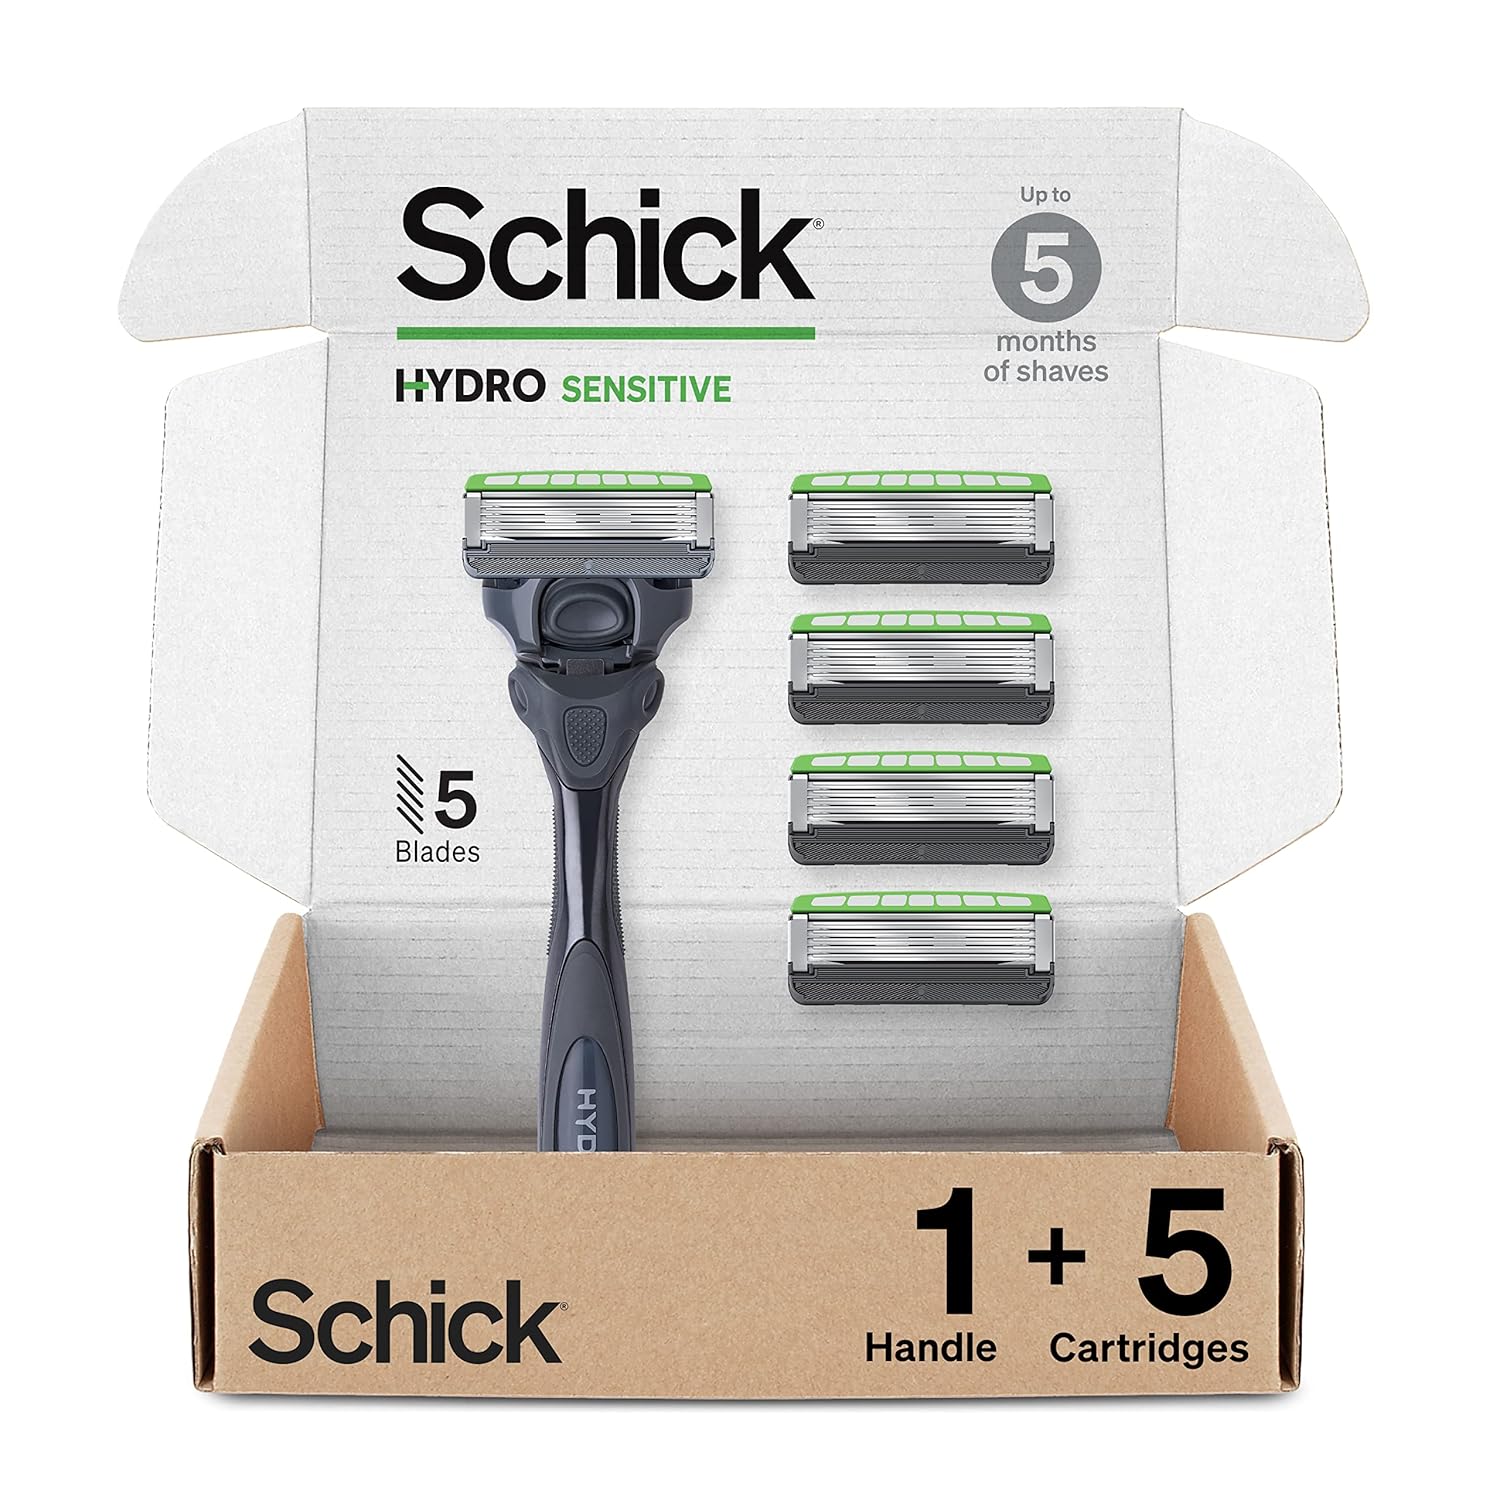
- Skin guards protect against irritation
- Dermatologist-tested
- Gel pools for maximum comfort
The Schick Hydro is great for sensitive scalps. It has skin guards on all 5 blades for extra protection against irritation and a wide lubrication strip, containing aloe and Pro-Vitamin B5. This means the razor is able to hydrate and soothe the scalp during shaving.
Of course, the Schick Hydro also has some downsides. The pivoting handle, also known as ‘Shock Absorb Technology’, is intended to adapt to the curves of the head or face, but it reduces the control you have over the pressure you can apply during shaving, leading to an uneven finish.
As you can see, choosing a razor to shave your head isn’t as simple as just grabbing whichever blade you got last Christmas. Make sure you know what you want most from a razor and the type of scalp you have before making your choice.
For more help, check out this post that details the best razors for shaving your head, with recommendations for every possible priority area. If you get a good result from a different razor, I’d love to hear about it in the comments at the bottom of the page.
Preparing Your Scalp
It’s important to prep before shaving your head to avoid irritation and razor burns, and look after both your scalp and your razor.
Step 1: Make sure your hair is short enough
Longer hair will tangle in the blades of your razor, and needs to be trimmed down with clippers before you think about taking a blade to what’s left. (Don’t forget to clean your clippers afterward and sharpen them regularly).
Ideally, your hair would be no longer than a grade 1 or 2 to allow your razor to work properly. Once you’re happy that your hair is short enough, you can grab some pre-shave oil as an optional step.
Step 2: Cleansing the scalp
From here, everything is easier if you shave in the shower.
First, wet your head with warm/hot water. The heat will soften the pores in your scalp and soften the hair follicles.
Using a specialist bald head shampoo is the best way, here. Don’t make the same mistake I did for years and grab whatever your wife has lying around the bathroom. Her special botanical shampoo for colored hair won’t help you maintain a healthy bald head.
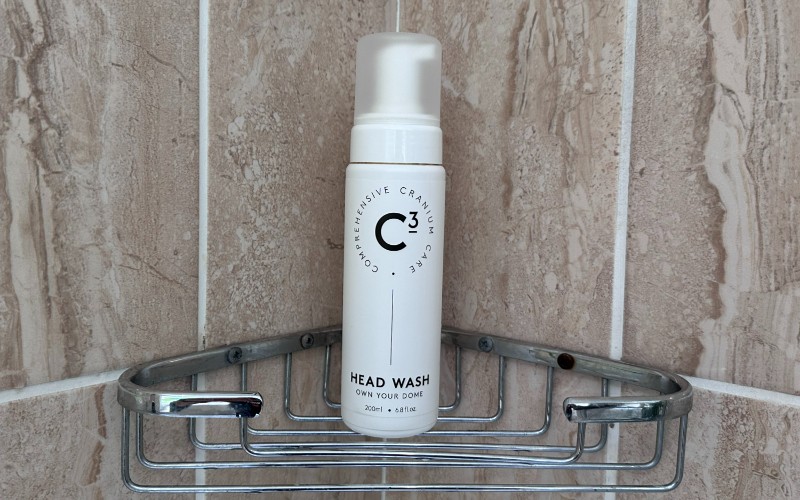
Instead, I’ve started using C3 Head Wash, which is specially designed to balance the natural oils that every bald head produces. It’s also free from sulfates, which dehydrate your bald head, so you won’t be left with that horrible dry feeling afterwards:
C3 Head Wash

- Prevents dry skin
- Hydrates the scalp
- Sulfate and paraben-free
- Cruelty-free, never tested on animals, vegan
You’ll always get a better shave with a clean scalp that’s free from dirt, oil, sweat, dead skin, and other buildup. Creating a clean surface for shaving means your razor can cut as close to the base of the hair as possible for a smoother shave.
Finish by rinsing thoroughly and opening your mind to something new:
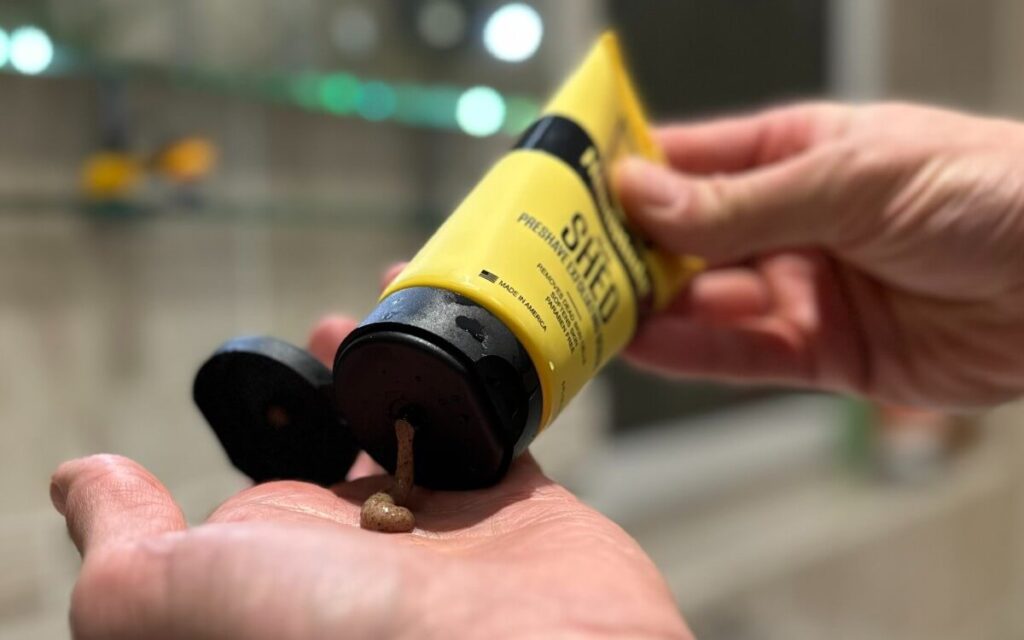
Step 3: Exfoliate
Exfoliating isn’t just for ladies and metrosexual men with perfect complexions. The idea is to scrub away any remaining stubborn buildup that gets in the way of your razor and attaches itself to your blades.
By exfoliating with a specialist bald head scrub, any remaining buildup is gone and your blades don’t get clogged up with dirt, which can create friction and increase irritation.
My scrub of choice is HeadShed by HeadBlade. As a bonus, you can get 10% off at the official site by using the code BaldandHappy:
HeadBlade HeadShed Exfoliating Scrub

- Prepares for Smooth Shaving
- Removes Dirt, Oil, Dead Skin
- Prevents Razor Clogging
- Gentle Yet Effective
- Easy, Comfortable Use
- 10% off with code BaldandHappy
The best thing about this scrub is how generous they’ve been with the ground walnut shell that gives such effective exfoliation:
Massage the scrub in circular motions into your head for a couple of minutes, taking care not to be too rough. The idea is to strip away a layer of dead skin without damaging the new, more sensitive layer of skin underneath.
Then rinse again and move onto the next step:
Step 4: Pre-shave oil
This is strictly optional, but pre-shave oil helps to soften the hair and moisturize the scalp. This reduces friction and irritation, and ensures a smoother shave.
It’s not completely necessary, but if I’m feeling fancy and I want to give myself the full wet shave experience, I’ll apply this oil from Pacific Shaving before I grab my razor:
Pacific Shaving Company Pre-Shave Oil
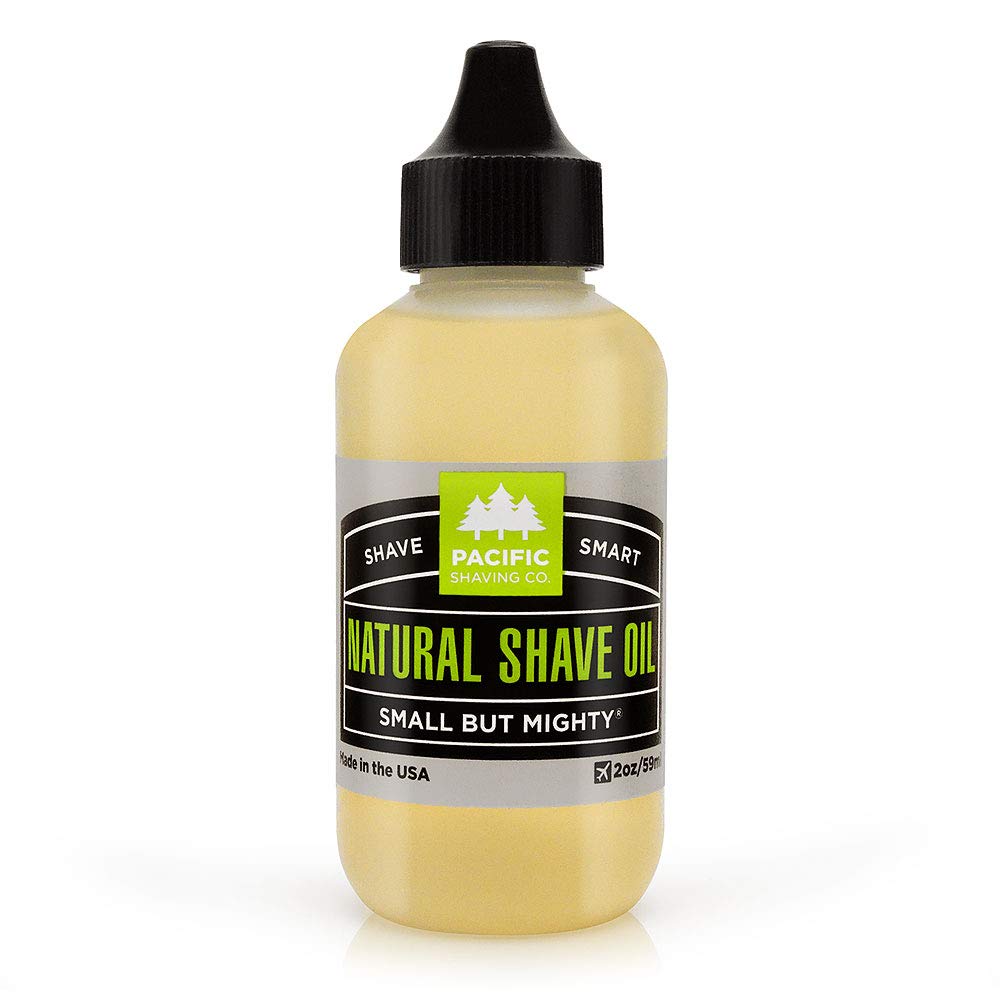
- Avoid cuts and razor burn
- Natural ingredients
- 400 shaves per bottle
- Protects sensitive scalps
Apply a generous amount to your scalp and massage it in, ensuring that your whole scalp is covered. The oil will provide a layer of lubrication between the blade and your skin, reducing friction and the likelihood of razor burn and cuts.
Leave the oil on your scalp for a minute or two to allow it to work its magic on the hair follicles.
Step 5: Shaving cream
Just before you grab your razor, you’ll need a good quality shaving cream. If you’ve applied pre-shave oil, you might think you don’t need shaving cream but the two actually work together really well, so don’t make the mistake of thinking you have to use one or the other.
Pre-Shave Oil:
This is used before you apply shaving cream. It helps to soften the hair and create a layer of lubrication on the scalp, reducing friction between your head and your razor. It reduces irritation, nicks, and cuts.
Shaving Cream:
Shaving cream is applied after the pre-shave oil and provides an additional layer of protection. It further softens the hair, making it easier for the razor to cut through it. Shaving cream also improves the glide of the razor across the scalp, which gives a closer and smoother shave.
Using both pre-shave oil and shaving cream together means:
- Enhanced Protection: Both products together create multiple layers of lubrication and protection, reducing the risk of razor burn, nicks, and cuts.
- Better Glide: The combination of oil and cream improves the razor’s glide over the skin, which can result in a closer, smoother shave.
- Increased Moisture: Both products can add moisture to the skin, which can help to prevent dryness and irritation caused by shaving.
- Softer Hair: Using both products can help to soften the hair more effectively, making it easier for the razor to cut through it and potentially providing a closer shave.
- Improved Shave Comfort: With the reduction of friction and the added moisture, the overall shaving process can be more comfortable.
But a quick word of warning: every head is different and some people find that using both products makes their skin feel too greasy. Try it out and adjust the process to suit your scalp.
Here’s the cream I use, which is also from Pacific Shaving:
Pacific Shaving Company Caffeinated Shaving Cream
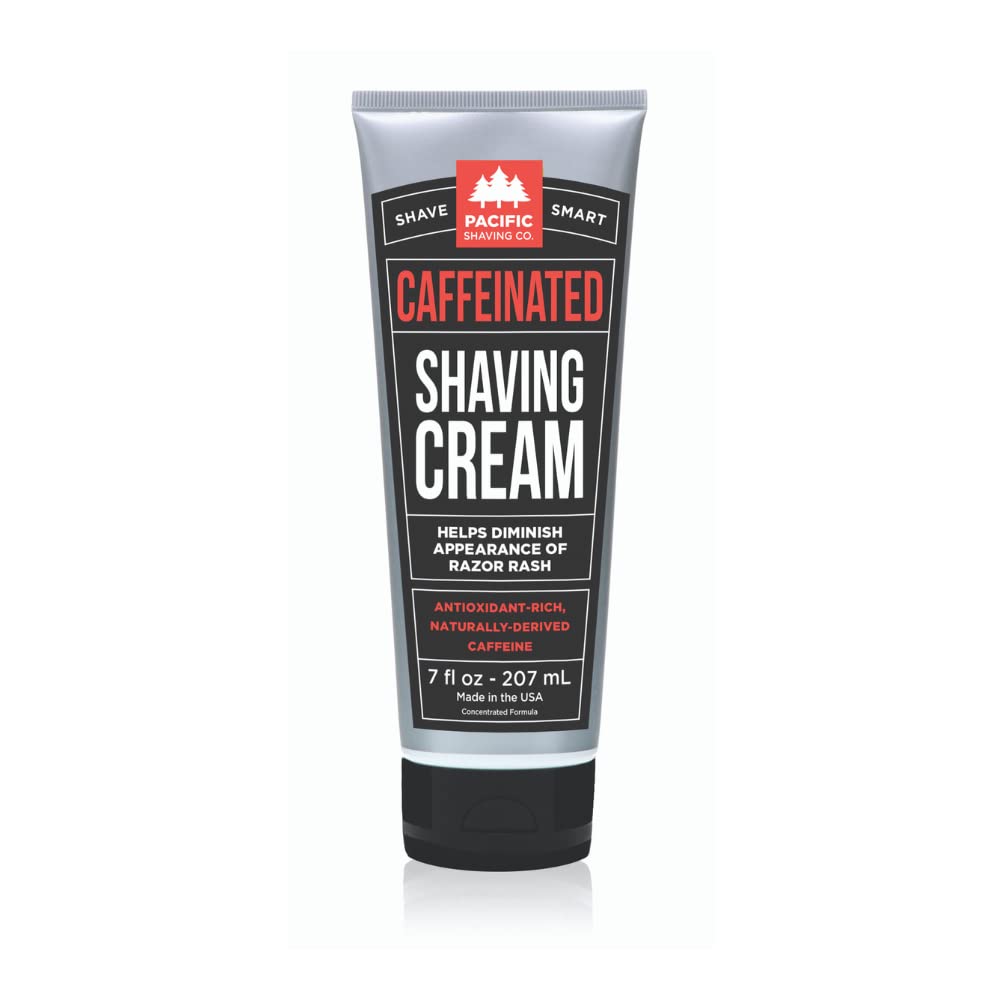
- Soothes skin
- Reduces razor burn
- Safe, natural & organic ingredients
- No animal testing
I’m really interested to know what brand of shaving cream works best for your scalp? Let me know in the comments below which you use and why you prefer it!
Shave
Now you’ve prepared your scalp, it’s time to get into the shave itself.
Shaving your head with the grain vs against the grain
If you’re new to shaving your head, don’t even think about shaving against the grain until you’ve been doing it for a few months to allow the scalp time to get used to the effects of the razor blade.
Instead, shave in the direction of hair growth to minimize the risk of ingrown hairs and irritation. Rinse the blade frequently during shaving to remove hair and excess oil.
When your scalp has toughened up a little, feel free to try shaving against the grain. You’re likely to see a little irritation the first few times, but once your head gets used to this it will be worth it to get the closest possible shave.
If your scalp doesn’t seem to be adjusting to this, check you have the right razor for you. You’ll definitely need good quality blades (another shout-out for the Leaf Razor at this point) and it’s worth trying out a razor like the Schick Hydro that’s designed for sensitive scalps.
Head shaving technique
Think of your shaving technique like mowing a lawn. If you go too quickly, you’ll miss parts of hair (or grass). If you use short, overlapping strokes, your razor will irritate your scalp like your mower would cut up your lawn.
One of the reasons for using a good quality razor is to minimize the number of times a blade has to pass over the same area of your scalp. Fewer strokes = less irritation.
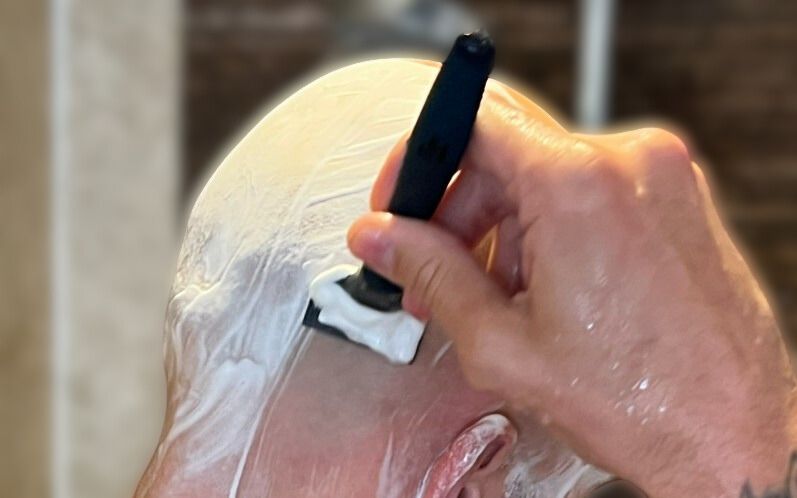
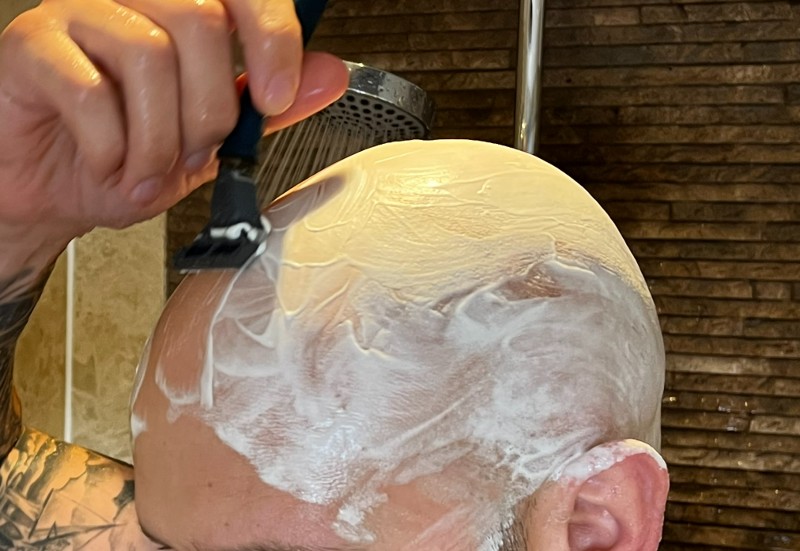
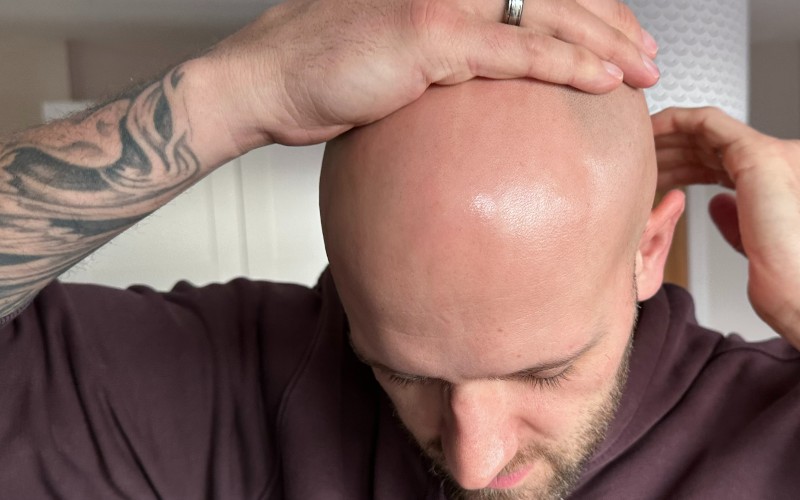
Use long strokes, and go slowly. Shave the top of your head from back to front and then down the sides. Finally, shave the back from the crown to the neck.
This means you’ll be shaving with the grain which is much safer, especially if your scalp isn’t used to a razor shave. The more you shave, the more your scalp will adapt to a blade and you can eventually move on to shaving against the grain, as shown in this photo:
Do you shave against or with the grain, and what results have you noticed with each method? Share your experience in the comments below!
Shaving around your ears
You’re guaranteed to miss a few hairs around the ears, and this is also an easy place to cut yourself as the blade comes into contact with the folds of skin where the scalp meets the ear.
This is an area where you can carefully shave against the grain so that you’re moving away from your ear rather than the blade traveling towards it, which would increase your chances of shaving cuts.
If you’re really not comfortable using a razor this close to your ears, just leave a few stray hairs and grab a head shaver or beard trimmer (like mine) to tidy this area later. If the shave isn’t quite as close here it doesn’t matter, as your ears will hide any stubble or shadow.
Shaving the back of your head
This is the trickiest part, for a few reasons;
- You can’t see the back of your head, so it’s hard to know where to shave
- Even if you use two mirrors, you’re looking at a mirror image so left is right and right is left
- It’s an awkward place to have to hold a razor at the correct angle to shave with or against the grain
The easiest solution to this is to use a razor that eliminates the awkwardness of the shave while you get used to the difficult movement of shaving ‘in reverse’.
As recommended above, the HeadBlade Moto is the easiest-to-handle head shaving razor on the market, and the perfect solution to this problem.
Instead of holding a razor at an awkward angle, it’s as easy as rubbing the palm of your hand over the back of your head, because the razor is attached to your palm by a ring that fits around your middle finger:
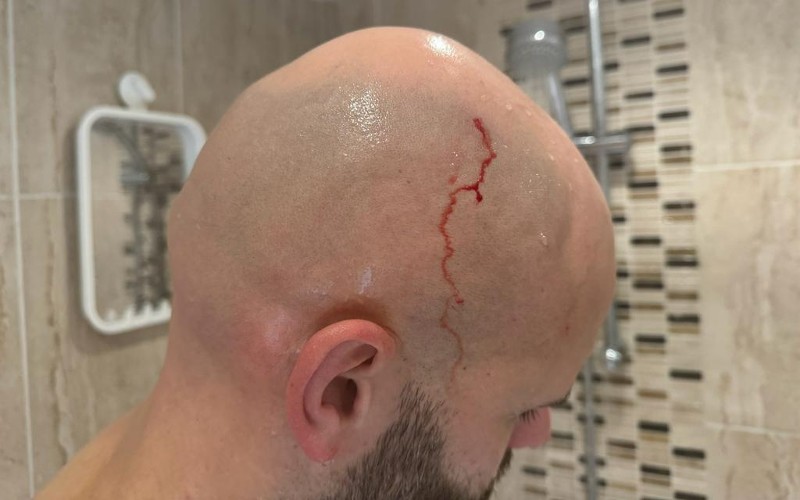
If you’re shaving with a traditional razor, the back of your head is going to be tricky. The best thing to do is use your non-shaving hand as a guide, giving yourself a ‘practice run’ and each stroke of your razor.
Take it slowly to give yourself a chance to recognize when your razor isn’t quite at the correct angle. Giving yourself a small shaving cut is better than slicing a long gash down the back of your head because you tried to go too fast!
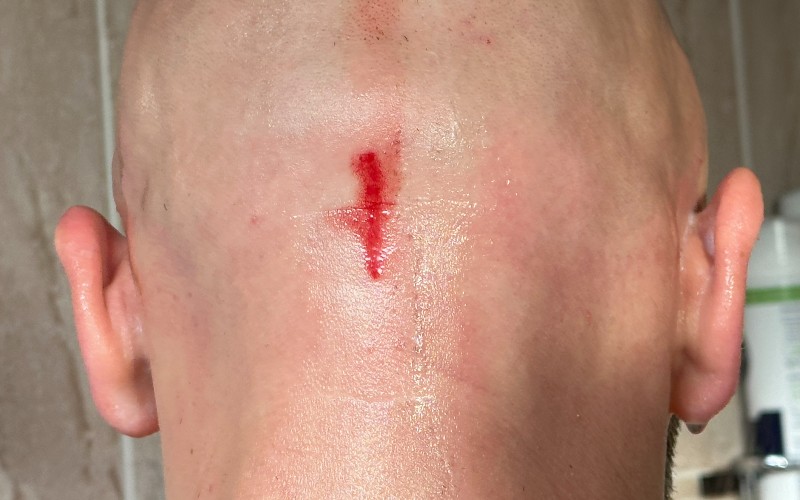
Most people recommend holding the razor at a 30-degree angle to your head for a close, safe shave. Realistically, it’s a big ask to expect you to know the angle you’re using when you can’t see the razor, so feel your way into it and learn to recognize when you’re getting a good shave.
My final tip for shaving the back of your head is to use light pressure. It’s really easy to turn your razor at the wrong angle when you’re essentially working back-to-front, so if you do accidentally cut yourself you’d rather not give yourself a deep flesh wound.
The finishing touches
When I first started shaving my head, I often missed little areas of hair around the back and sides, simply because I couldn’t see them.
To avoid this, run your hand over your head to check for any little bits you might have missed. When you find them, simply run the razor over those areas again until it’s smooth.
It’s much easier to feel exactly where these are than to rely on mirrors. Using your non-shaving hand as a guide before taking your razor to where you can feel the stubble is a trick I still use today.
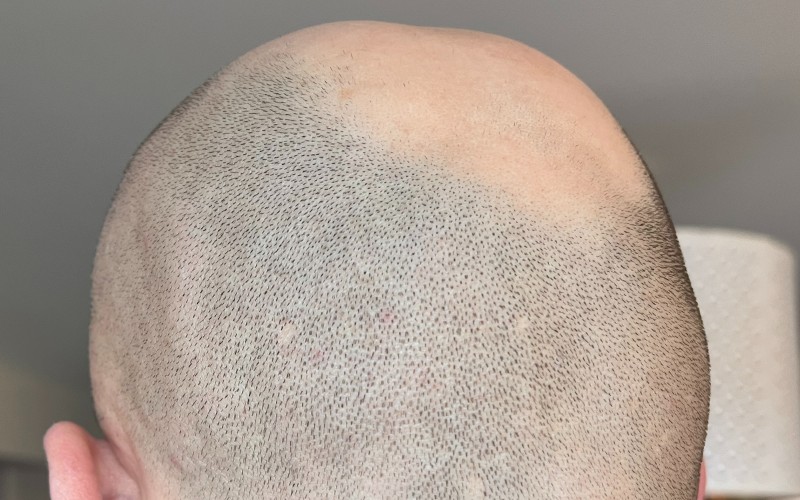
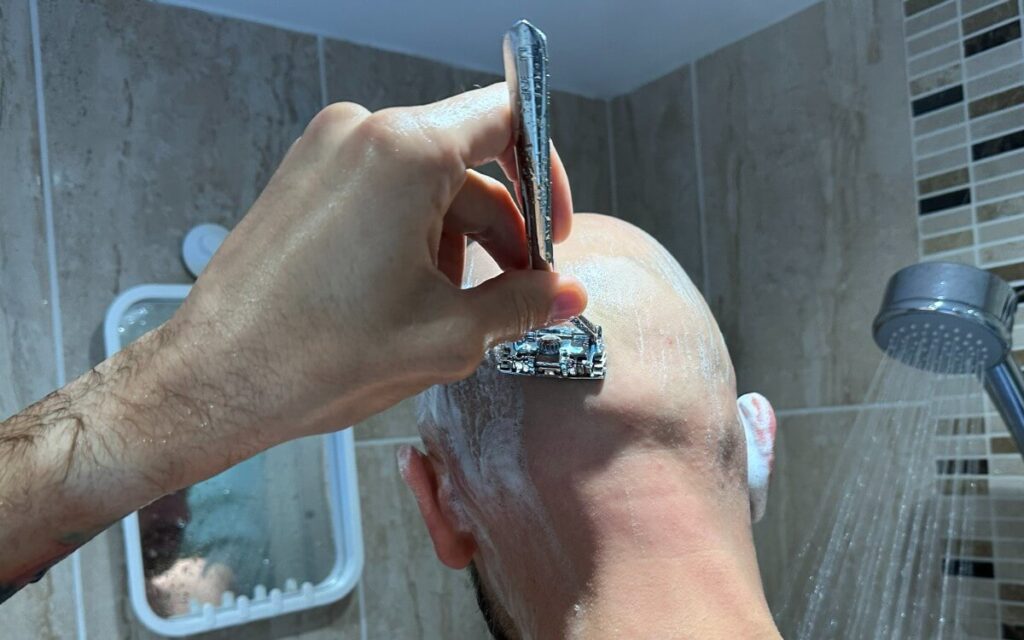
My problem area is the edge of the ‘horseshoe’ where the hair still grows around the back and sides:
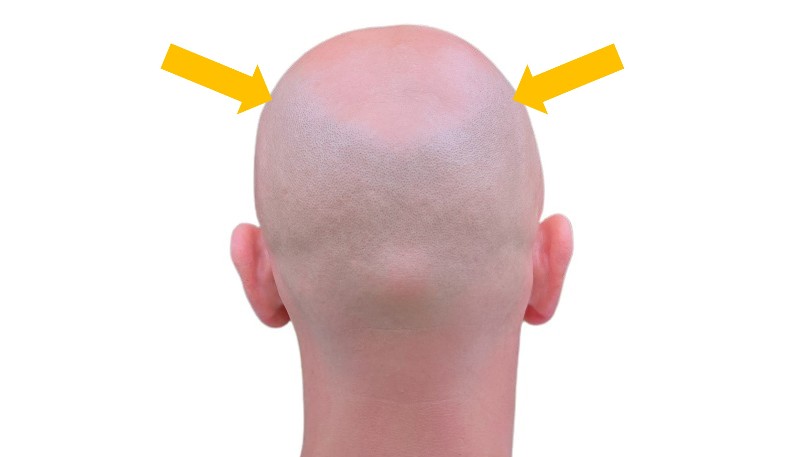
This hair still grows quite thick and I seem to shave really well up the sides, but not so well on the curve up towards the top of my head where it’s tricky to keep contact with the surface of the scalp.
By rubbing my hand against the grain of the hair, I can laser-focus to exactly where I need a second pass with the razor, and even up my shave.
Next, rinse your head thoroughly, and carefully towel off. Your scalp will feel sensitive after a shave so don’t rub your head too vigorously, just dab gently with a soft towel until dry.
If you notice any spots of blood on your towel, you’ve probably given yourself a shaving cut or two. It happens to the best of us. A styptic pencil is a great tool to have in your bathroom cabinet to stop the bleeding:
Clubman Woltra Nick Relief Styptic Pencil (Pack of 2)
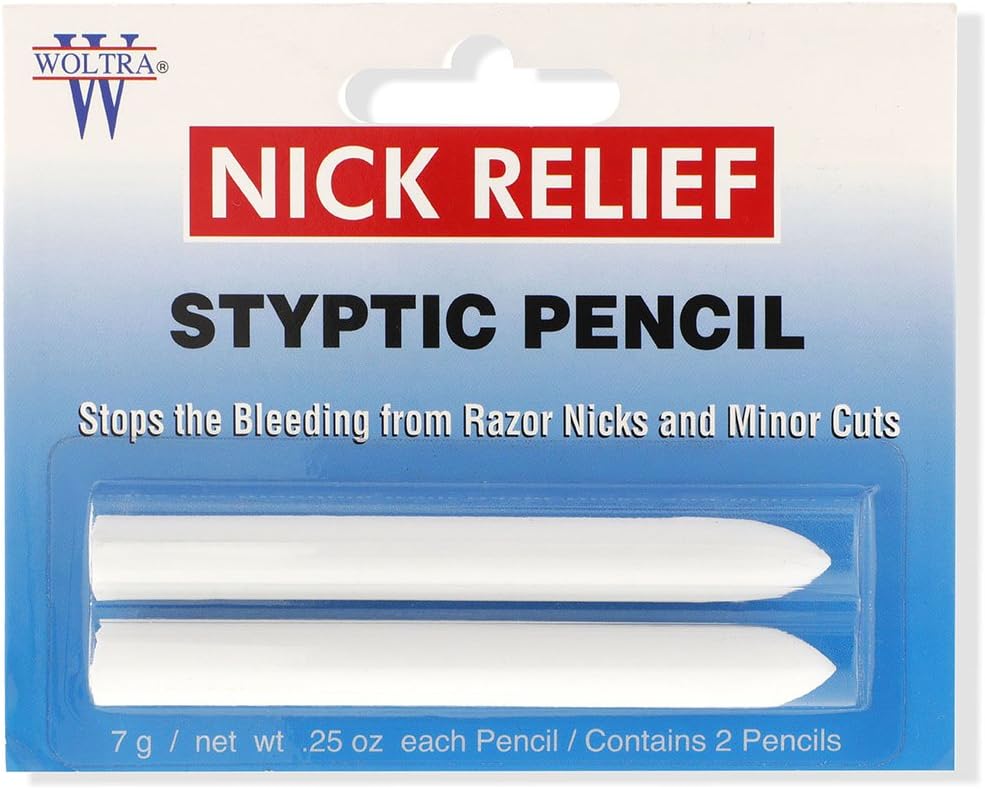
- Stops bleeding quickly
- Works on minor nicks & deeper cuts
- No more TP squares!
Aftercare
If you’re prone to irritation I’d highly recommend a post-shave treatment designed to soothe the scalp.
I use HeadBlade’s ClearHead scalp treatment, which I apply as soon as I can after shaving. It makes a big difference to the amount of redness, soreness, and irritation I experience after a razor shave.
HeadBlade ClearHead
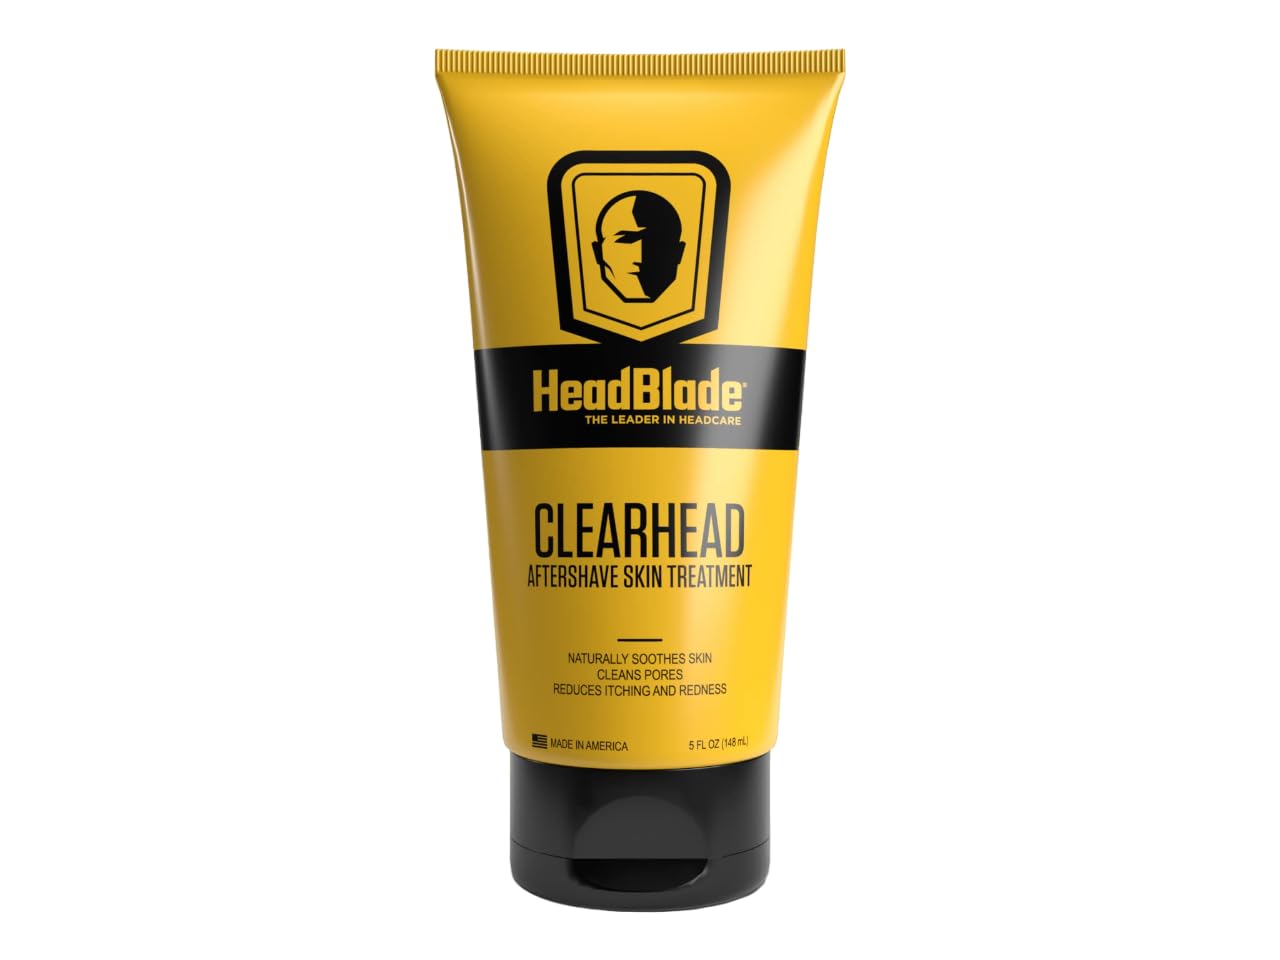
Aftershave Scalp Treatment
- Reduces Razor Burn
- Prevents Ingrown Hairs
- Reduces Oiliness
Moisturize
Once your head is dry, you’ll start to feel like your scalp is dehydrated. This is natural, as shaving really strips away the natural moisture from your scalp, especially as you’ve washed and exfoliated away all the natural oils.
Your choice of products and the ingredients that go into making them can affect how extreme this dryness will be. Regular cosmetic shampoos tend to contain sulfates, which act as a foaming agent but draw moisture from the scalp.
Specialist bald head shampoos and cleansers tend to not only avoid using sulfates, but also include other ingredients that hydrate the scalp. You can also find shaving creams and other products that have moisturizing ingredients to reduce how dry your scalp feels after shaving.
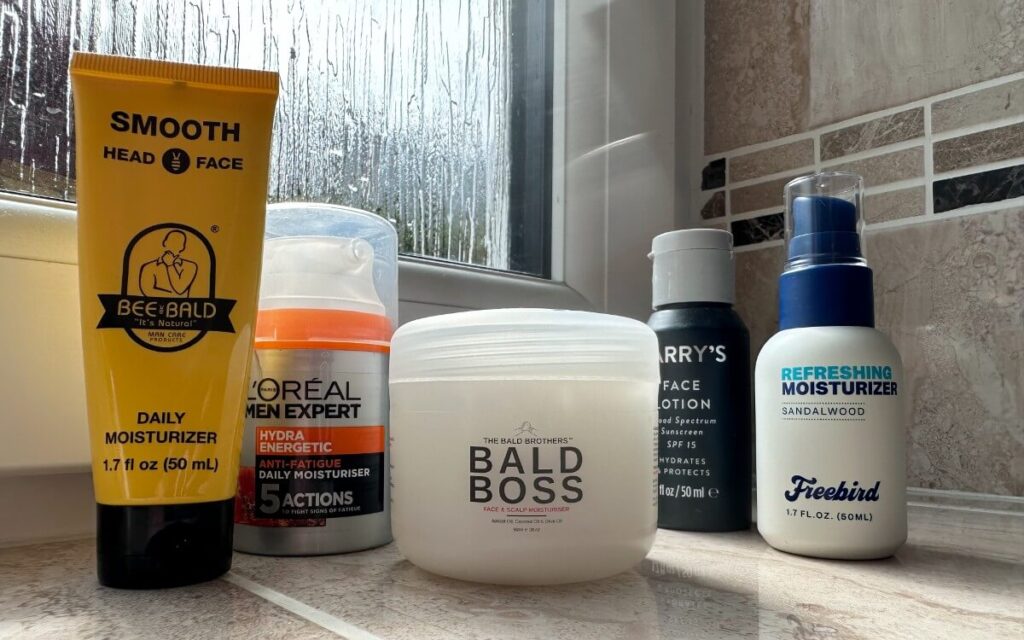
Whichever products I use, I always reach for the moisturizer after shaving. I want my scalp to be nourished and hydrated to keep my bald head looking and feeling its best. It seems to be working too – I was recently asked what my skincare routine was because (I guess) my bald head was looking great!

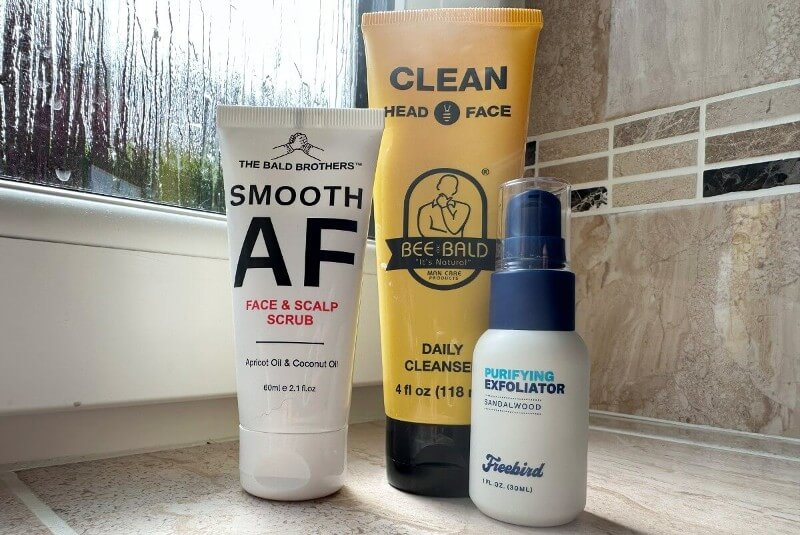
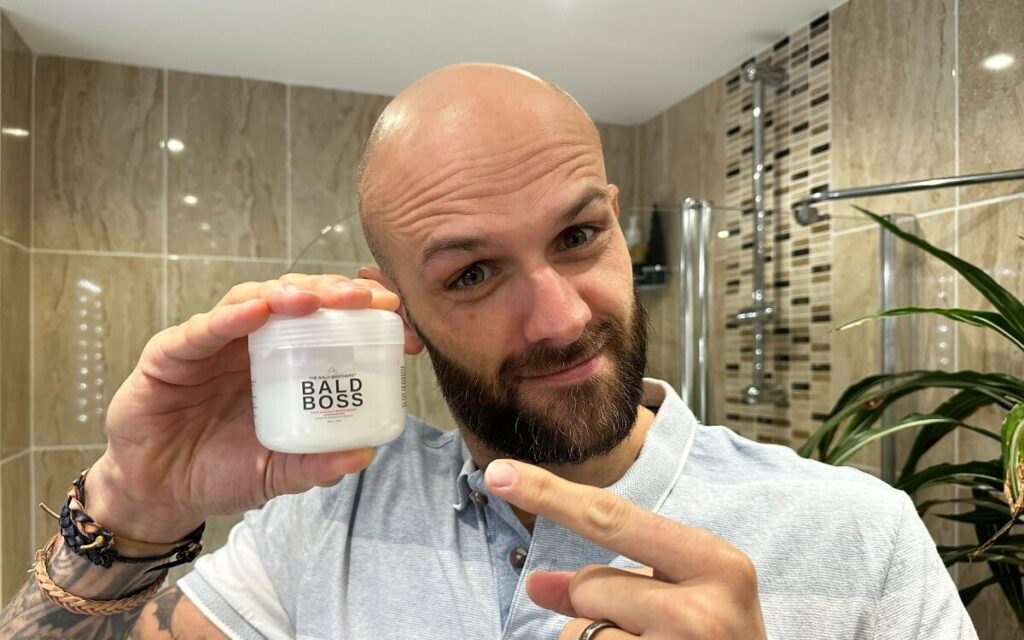
I have a few moisturizers that I like to use, including Bald Boss by The Bald Brothers (read the full review here and get 20% off at the official site with code HAPPY20).
I also use Bee Bald’s Smooth daily moisturizer with SPF if I’m going to be out in the sun for the day:
Bee Bald Smooth Plus Daily Moisturizer
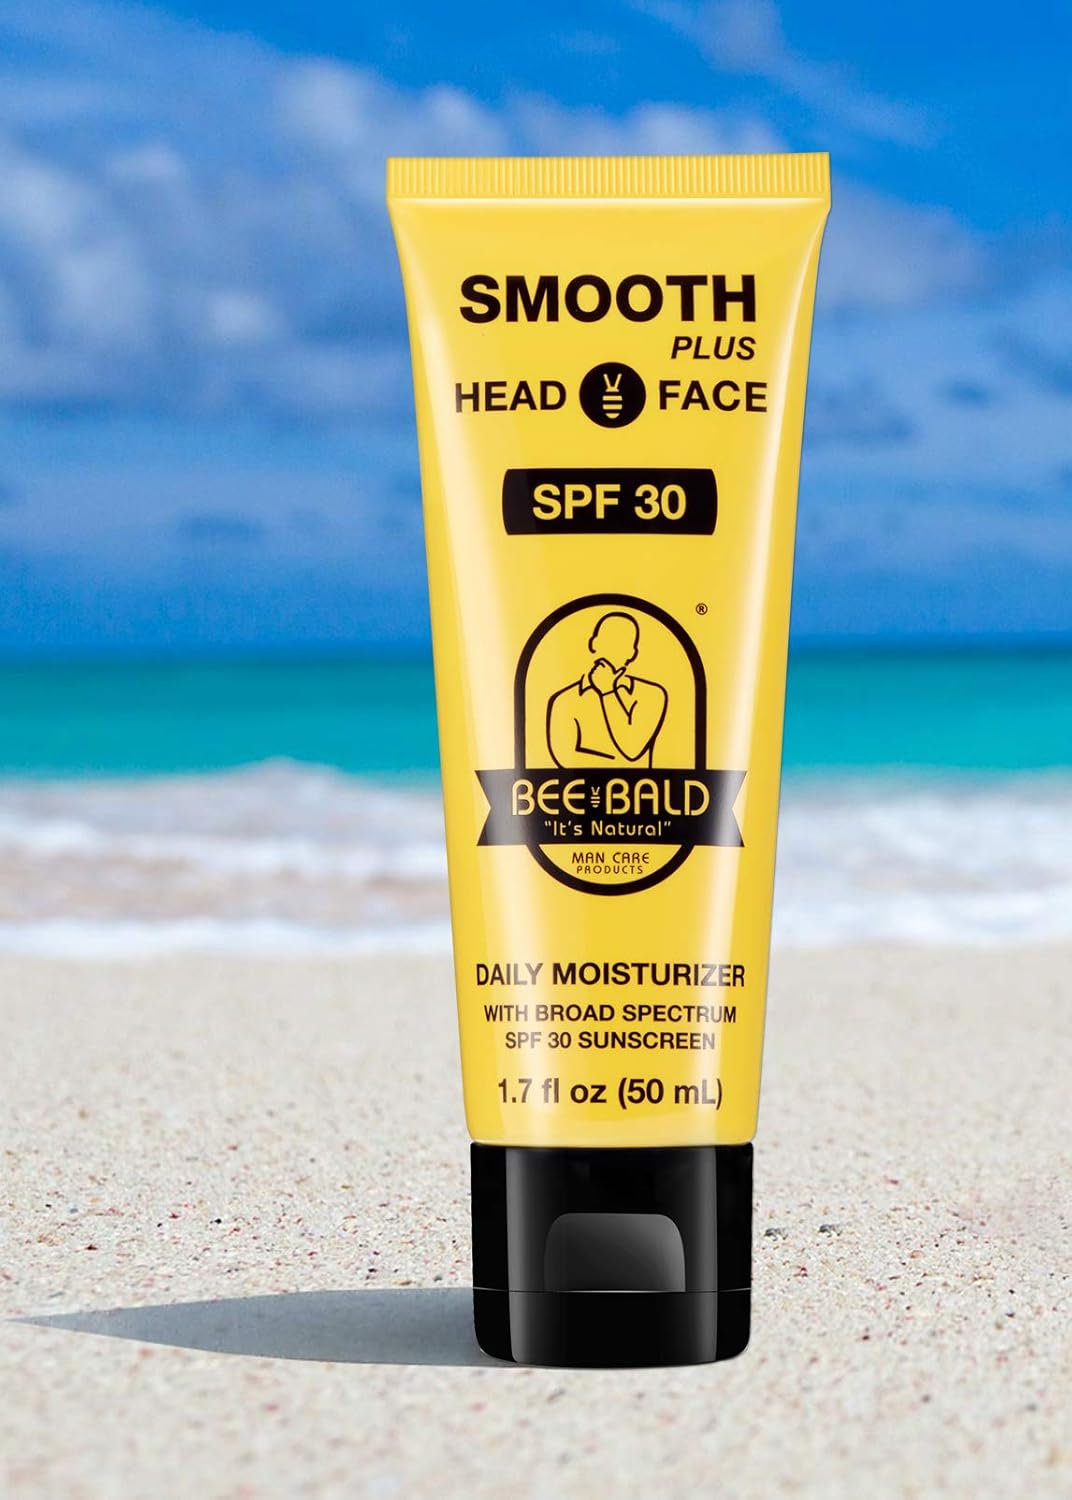
- Protects from UVA/UVB rays
- Tones, hydrates & moisturizes scalp
- Smooths fine lines, wrinkles & dry patches
Just as there are different razors for different needs, there are lots of bald head lotions to choose from depending on what’s most important to you. I go deeper into this with specific product recommendations in this guide to the best bald head moisturizers.
Whichever you choose, make sure you don’t skip this step. Even simple hot water will dehydrate your scalp, so moisturize daily after showering, but especially after shaving.
Over the long term, your scalp will look and feel much healthier.
How do you keep your scalp moisturized after shaving? Any favorite products or techniques you can recommend? Let me know in the comments below!
FAQs
Whether to shave with a razor or electric shaver depends on what you’re looking for. Razors shave closer, but electric shavers are more convenient when you need a quick buzz without having to go through the full wet shave routine. Electric shavers are usually better for sensitive scalps, too.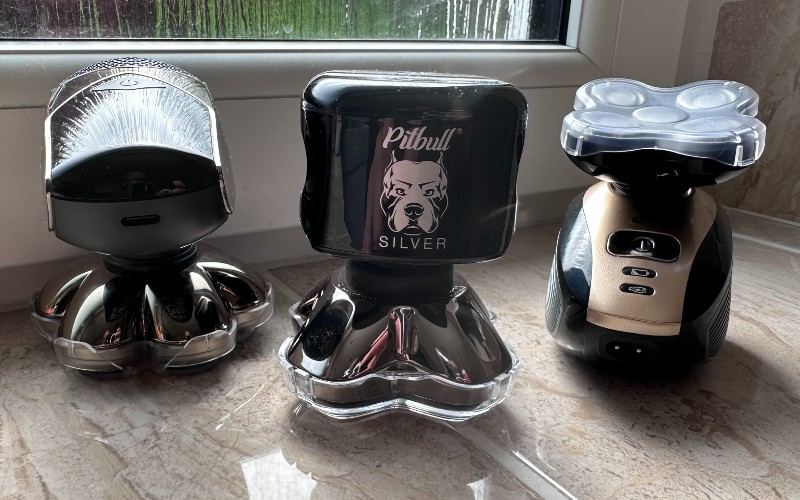
It’s safe to shave your head with a razor if you prepare your scalp properly before you start. You’ll need a sharp, clean blade to prevent cuts, and it’s worth knowing whether you have a sensitive scalp so you can find the best razor to suit your head.
Shaving your head with a razor every 2-3 days will keep it looking smooth. If you shave more frequently than this, your scalp won’t have time to recover in between shaves and you’re more likely to suffer from redness, soreness, and irritation.
You can shave your head with a safety razor as they will give you a close, smooth shave. You’ll need to make sure your scalp is clean and it’s always best to exfoliate to reduce friction and irritation. Go slowly and take care with your technique to avoid cuts.
You don’t need a special razor to shave your head, although there are razors that are specifically designed for head shaving. The best razor for you will be the razor that best suits your specific needs, like using a razor designed for sensitive skin if you have a sensitive scalp.
You can use most razors to shave your head, but are specifically designed for it, like the HeadBlade Moto. Other razors that aren’t designed specifically for head shaving actually give a closer shave, like the Leaf, while others warn that their razors aren’t for head shaving at all, like Harry’s.
Using a straight razor to shave your head is possible but it requires skill, patience, and a very steady hand due to the unforgiving nature of the blade. A professional barber will often use a safety razor to shave your head but it’s not recommended for use at home.
You can shave your head with a disposable razor, but make sure it’s sharp for a smoother, safer shave. The advantage of using a disposable razor is that you don’t have to worry about maintenance, but they are bad for the planet due to plastic waste.
You can use any Gillette razor to shave your head. The Gillette ProGlide Shield is a great razor for head shaving due to the FlexBall handle that pivots left and right, helping the blades maintain contact with the scalp for a smoother, more even shave.
To shave your head without getting razor bumps, use a sharp, clean blade, apply a pre-shave oil to a clean, exfoliated scalp, and shave in the direction of hair growth. Rinse with cold water and apply an aftershave balm or bald head moisturizer to soothe the skin.
Summary
Shaving your head with a razor instead of an electric shaver is something every bald guy should try. The feeling of a freshly-shaved scalp is odd at first, but rubbing your hand over a completely smooth head beats the stubble of a buzz-cut any day.
If you’re still not convinced, check out this article breaking down the argument around shaving your head with a razor vs an electric shaver.
If this article convinces you to wet-shave your head, I’d love to hear about it. Let me know how it goes in the comment section below!